Making a Power Wheels Racer at FamiLAB!
For this year's Maker Faire Orlando, I decided to make a power wheels racer. It was an amazing adventure that anyone who can, should absolutely participate in! Keep scrolling to see a photo log of how it was made and photos from the event! If you have any questions about what was done or how it was done, feel free to ask in the comment section at the end of the post.
This is me disassembling the back end of my car. I found that laying on the bench and reaching up into the car was the most efficient way to take everything apart.
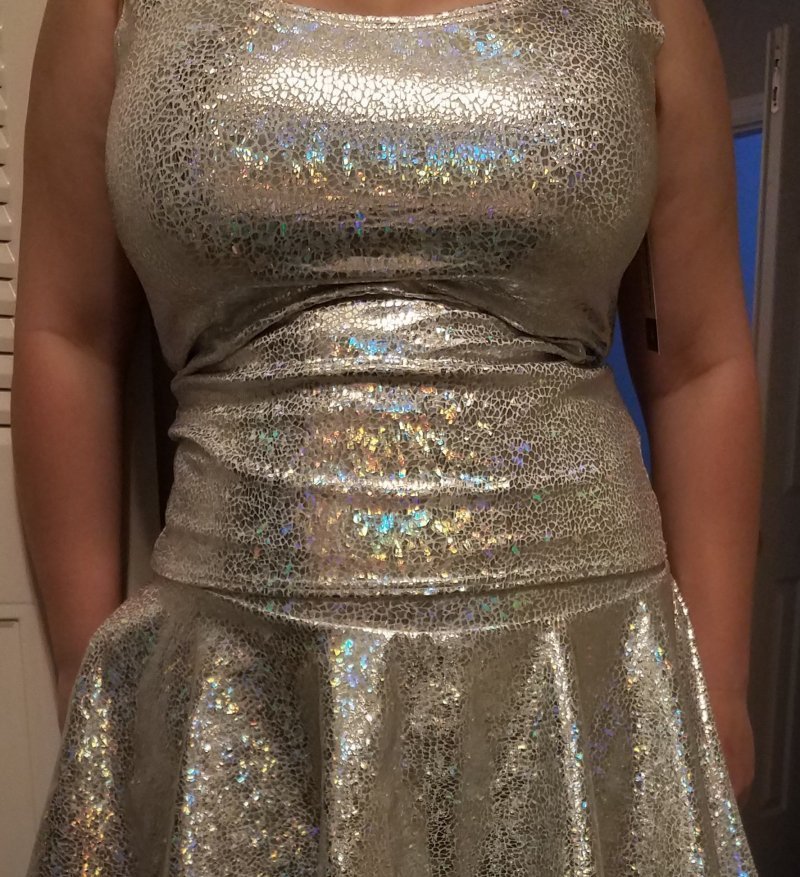
This is the outfit I wore. I wanted to have everything possible holographic so that it was extra shiny!
Photo of my outfit up close with flash on
This is a close up of the wheel assembly in it’s early stages
This is the front end of the car. This frame is made of steel square tubing that’s been welded together.
This is the back end of my car. The frame and motors won’t fit properly with the extra plastic so we removed it. (before)
Sometimes the car’s body need to be adjusted to work properly. This is the back end of my car, after a lot of plastic had been removed. (after)
Photo of Nick, my male companion unit and business partner posing with my car. He’s spent a lot of time on my car, and between working on his car and everything else, it means a lot to me. Thank you Nick <3
This is a weld shot from the frame
Another photo of my wheel assembly in progress
Back end of my car, before it’s been holo-fied
My buddy Ehren doing the robot while checking out my car
Originally, I wanted to vinyl wrap the entire car in linear holographic vinyl. This is a test on the door to see if vinyl wrapping was feasible or not.
We had to use the heat gun to stretch out the vinyl around the edges. This was very tricky because if the vinyl got too hot, it would dull the holographic effect immediately.
This is my friend Chuck holding up the door after being wrapped and reassembled.
After wrapping the door, I realized that the car had a lot of small defects that were only visible after wrapping. Because of this, I decided against using linear vinyl. I ended up painting the car with Modge Podge and glitter, and I decided to add lighting to add that extra pop. Thank you for the help with this Chuck!
Nick taking a moment to plan the next step in building mounting points for the front of the car
Photo of the welding gun taking a nap while Nick chopped up some more square tubing
Front end of the car after gaining a beefier frame
Nick cutting off some more square tubing to add better mounting points on the front bumper
Top view of the frame attached to the underside of the body
Close-up of the front frame assembly. Now with mounting points!
Close up of the bumper mounting
Wide view to show the wheel assembly gaining pieces
This photo shows a bit of the brake assembly in progress as well as the testing of the battery placement.
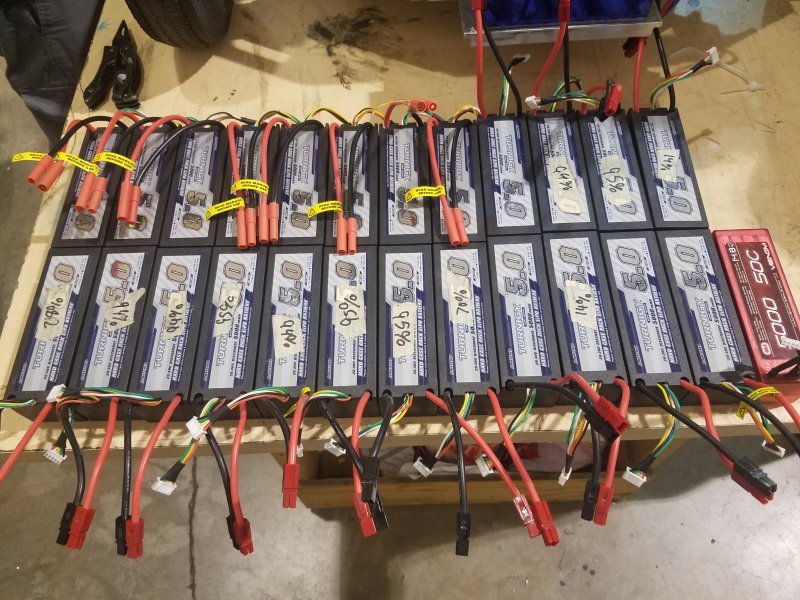
Lots of lipo batteries! These will be used for my car and the Rick and Morty car my MCU is making.
The motor and gear box have been mounted! It’s getting so close!
Close-up of the motor mounting bracket. This mount was manually machined on a Bridgeport mill. It has slots instead of holes for the bolts so that the tension can be adjusted.
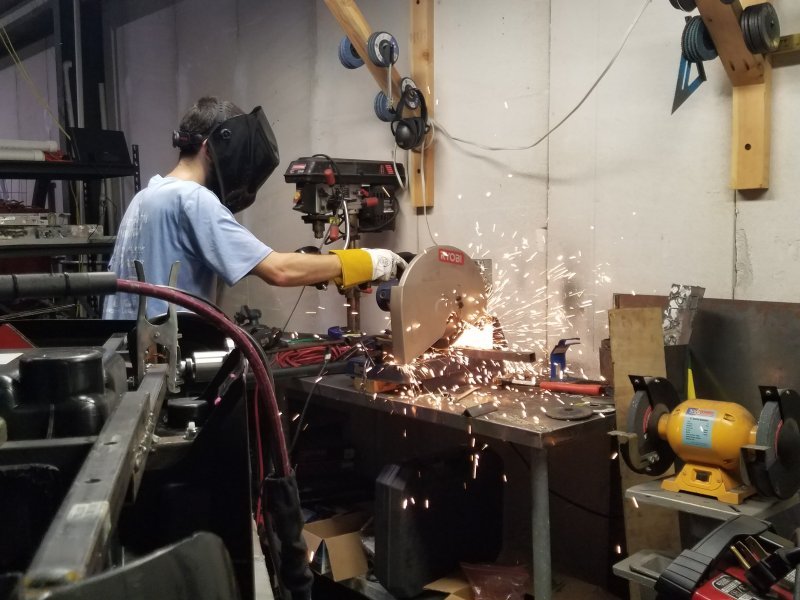
Jamie taking an angle grinder to a piece of metal to make a new back bumper
Making things isn’t always pretty. Sometimes tools end up in a cluster or even upside down XD
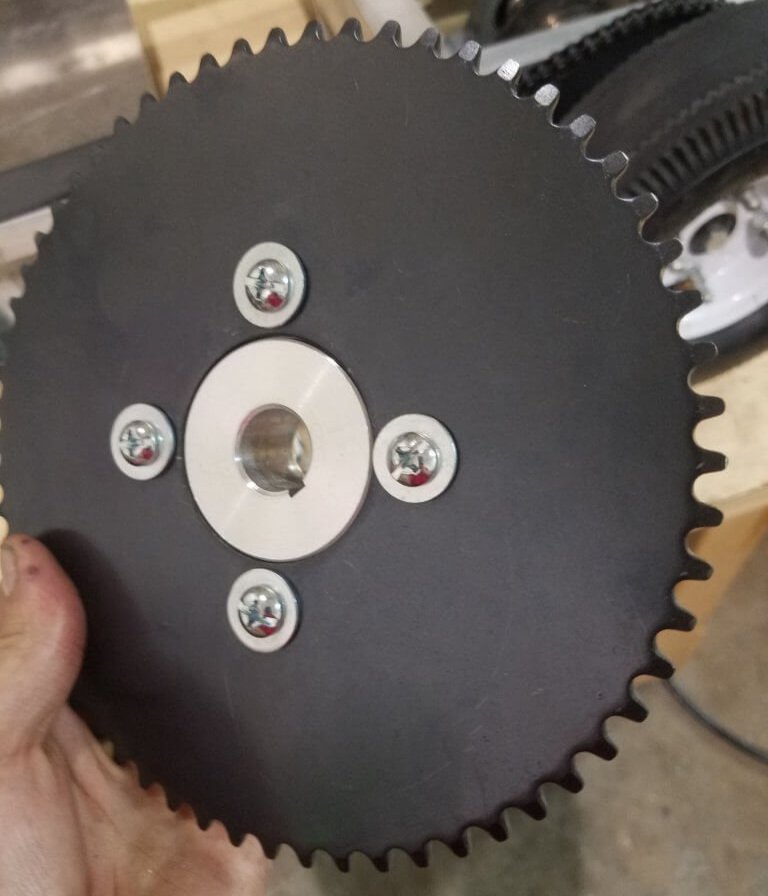
While Nick was testing out his car (with the same components) he broke the planetary gearbox. The shaft bent and because of how it happened and that it was during light testing, there was no way they would hold up during a full race. This happened with less than a week to the faire so we didn’t have enough time to buy much and ended up switching to a 2-stage chain drive while keeping the 10 to 1 reduction with just the sprockets we had on hand. Luckily we had enough sprockets on hand to build the 2 assemblies needed for our cars.
My co-driver Alyce wanted to help paint the car. We were trying to burnish the glitter to give it a better effect, but that proved to be too hard to do with the Mod Podge’s consistency. At this point, we were painting on the Mod Modge and covering it with loose glitter and then trying to rub it in so the effect was a bit dulled out from the glue. I ended up trying another process later on so keep scrolling for more information on that.
Headlights before I glittered them
Headlights after glittering them!
Photo of the right side door. I took the door apart so that I could remove the door handle and get the crisp color difference. I’m a big fan of the drastic color difference between the silver and purple so I’m very glad the vinyl didn’t work out as planned.
Right door with the flash on so you can see a bit more of the holographic effect
To get the glue and glitter to stick well, I had to sand the surfaces to rough it up. I made sure to take off the emblem so that I could cover it in purple glitter to have another accent piece.
After getting tired of painting on glue and then coating in glitter for 2-3 coats I decided to try something new. I mixed the glitter with the glue to form a thicker paste, painted that on, and covered it in loose glitter. This was a serious time saver, as I only needed to do one coat and maybe some touch-ups.
I was using a foam brush to paint on the glue mixture. It worked pretty well for getting a nice thick and even coat so I’d definitely recommend this process. Be sure to get a fully opaque coat if you try this so that there’s minimal touch-up required.
I found that if I painted quickly, I could work in larger sections to save time. I’m not sure that I would recommend this though because it was really stressful to rush. I’d say working in smaller sections is better, but do them as large as you’re comfortable with because there are still glitter seams if the sections aren’t all the same thickness.
Glitter free fall! I found to get the best opacity, I needed to cover the area in a really thick amount of glitter. It ended up taking a lot of glitter up front but I was using paper towels to collect the loose glitter so that I could reuse the fallout.
A heaving coating of glitter that will be brushed off after 20-30 minutes. The glue underneath needed to fully dry before I could brush the extra off or it would end up mixing with the glue and dulling the holographic effect.
Photo of the front with flash on
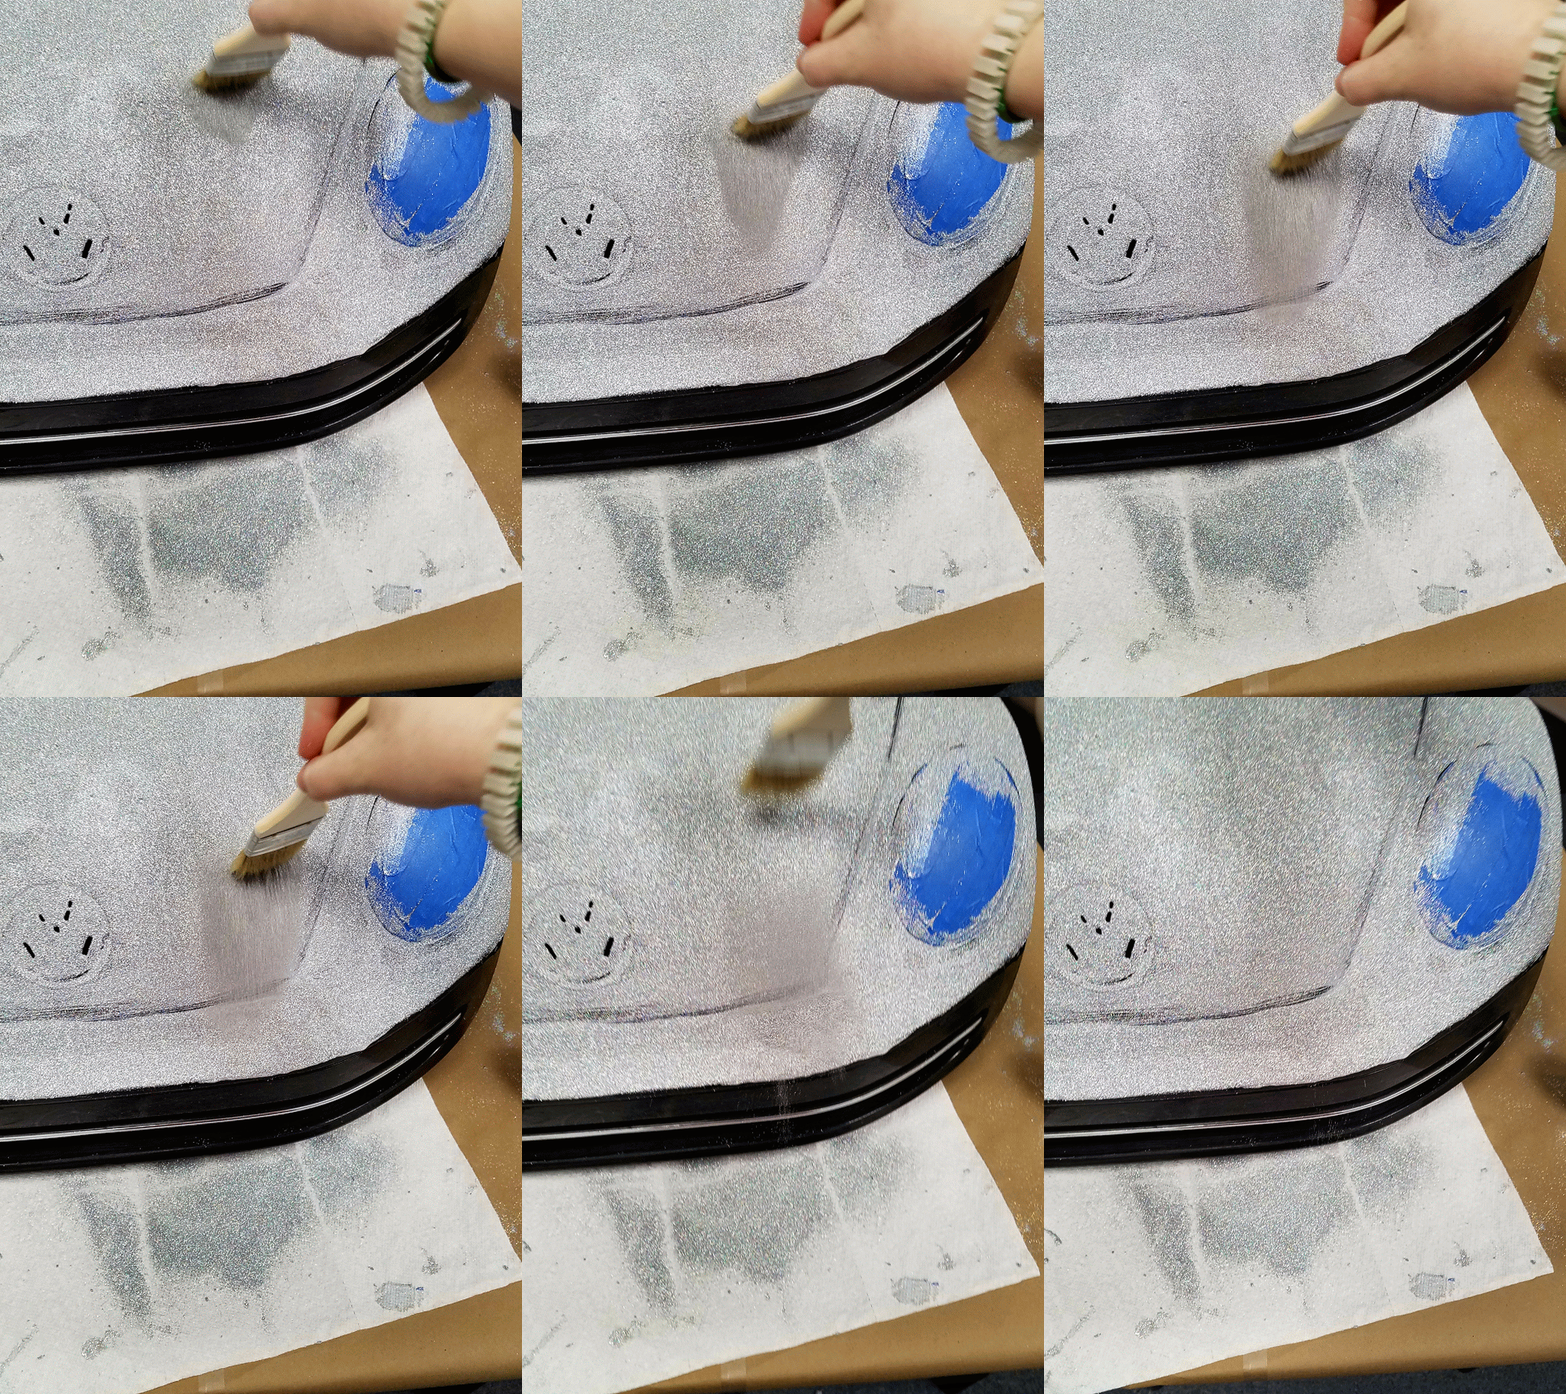
Once the glue was dry, I just used a cheap paintbrush to guide the glitter off. This got about 98% of it off so I was pretty happy with how this worked.
GIF of the loose glitter getting brushed off. Sorry for the angle and jitteriness of the GIF but the fallout was too satisfying to leave out.
Close-up of the rear side. I used painters tape to cover the areas I didn’t want coated and it worked pretty well. I used an X-acto to cut along the seam to get a clean release since the glue had dried by the time I went to remove it.
Close-up of the glitter. Unfortunately, the room I was in didn’t have the optimal lighting for the holographic effect so it just looks like boring silver glitter.
Side view of the right side while in progress
The silver is finally done! I still needed to add the purple accent holo to cover the pink but the majority of the work was done at this point.
I knew the helmet would take a while but because it needed less attention to detail, I watched Moana while working. I may or may not have watched this just to get a photo of the helmet with Tomotoa in the background.
How better to get the point across, than by just putting glitter there!
EVENT TIME!!! Unfortunately, my car wasn’t functioning til the day of, but Nick and Dave stayed up til 2 or 3 to get it close enough. This shot is Nick showing Dave and Lindsey what needed to be fixed on the car’s dashboard.
Moxie board of the event. Can you tell which is mine?
Photo of me in the car before the moxie show. Unfortunately, the holographic effect on the car didn’t photograph well. But oh my god, in person, it looked AMAZING!!!!!
This is my favorite photo from the event. The wiener mobile gave out ketchup and mustard to the kids, so I figured I’d hand out the rest of my glitter. Such a great idea, but I wish I would’ve remembered to put the face shield back on! The kids loved it and I didn’t mind being covered in glitter so I’d say it worked out well for the moxie show. Each kid ended up getting about 1-1.5 oz and it was the perfect amount for the two passes I did.
Another glitter shot. I realized after the first pass that the kids didn’t hit me very much so I sacrificed myself for the moxie and just parked in front of them on the second and last lap.
Huge shout out to Joela for letting me use her song “Honey I’m Everything” during my moxie. The song was perfect! Unfortunately, the video didn’t turn out but the song can be found here https://www.youtube.com/watch?v=A0g8DCva7FA I really wanted to use “Bitch I’m Everything” but opted for the more family-friendly version to try and get more moxie points from the crowd.
Photo from the first race. I’m being passed by the ACME car driven by Aren and Enterprise is in the background.
Another race shot. This time just after I was passed by Nick’s Rick & Morty Car.
I know this doesn’t really show my car but I thought this was too great to leave out. The Keith Mobile wasn’t a Power Racer but did a few laps for the hell of it.
The racing is crazy fun but sometimes it gets serious! Race shot from race #3
Race shot from race #3. I love the guys face in the background. I feel like this shot really shows how fun this is for racers and bystanders alike.
I think this shot is from Race #2. Behind my car is the Mystery Machine driven by Andrea, followed by Nick in his Rick and Morty Car, and then Kyle driving the Wiener mobile
To build up some hype for the endurance race, all of the cars got together and paraded around the Faire. I’m a little hurt that they gray-scaled the holo, but the photo is pretty great.
Endurance race time!
Another shot of Alyce, this time driving the car during the endurance race. The doors of the car were very susceptible to flying open, so I’m going to add some latches before it’s next race.
Another shot of Alyce driving
Giving people high fives was a great way to get more moxie from the crowd but it was a little terrifying. Luckily I didn’t crash but it was really tough to continue steering straight with only one hand on the handlebars.
Overhead shot from a camera boom car. Andrew is driving Drifty Monster up front, followed by me driving the holo bug, then Nick driving Rick and Morty, and then there’s Raphael being driven by Neiko.
Screenshot from the lineup from race #1
I ended up getting a Maker of Merit ribbon at the end of the faire! Overall this event was a ton of fun! The build was quite stressful but I can’t wait to race this again!
Race videos can be found below
Race 1: https://vimeo.com/240289644
Race 2: https://vimeo.com/240290983
Race 3: https://vimeo.com/240293837
Endurance Race: https://vimeo.com/240232166
Race photos by: Michael Bernstein, Adam Temple, and Roberto Gonzalez
Note to my financial helpers: Mike and Jamie thank you so much for helping make this car a reality. It means so much to me that you guys made this happen. <3


